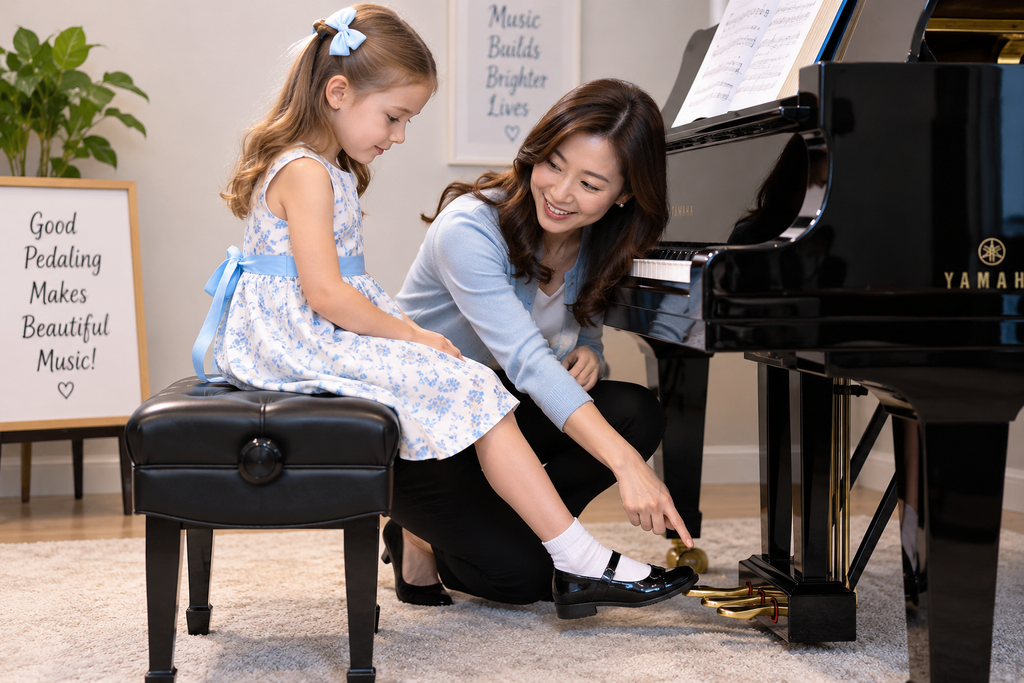
When beginners first sit at an acoustic piano, they often wonder, “Why are there three pedals?”
Learning how to use piano pedals for beginners can feel confusing at first, but understanding what each pedal does make the process much easier.
The three pedals may look almost identical, but they have different purposes. To make things a little more confusing, the pedals on a grand piano and an upright piano do not always work the same way.
Beginners do not need to learn all three pedals at once. In my lessons, I usually start with the right pedal, because it is the pedal students will use most often.
Here is a simple explanation of the three piano pedals and how beginners can start using the pedal correctly.
1. Right Pedal: Damper Pedal (Sustain Pedal)
The pedal on the far right is called the damper pedal, or sustain pedal. These are two names for the same pedal.
It is called the sustain pedal because notes continue to sound after your fingers leave the keys. It is also called the damper pedal because pressing it lifts the dampers away from the strings, allowing the strings to continue vibrating.
This pedal works essentially the same way on both grand and upright pianos.
The damper pedal can make music sound fuller, smoother, and more connected.
However, beginners often make the mistake of pressing it down and simply holding it.
When the harmony changes, the pedal usually needs to change too. Otherwise, the sounds begin to overlap and the music can become blurry or muddy.
Good pedaling means learning when to press, release, and change the pedal while listening carefully to the sound.
2. Left Pedal: Soft Pedal
The pedal on the far left is commonly called the soft pedal, but it works differently on grand and upright pianos.
On a grand piano, the left pedal is also called the una corda pedal. When you press it, the piano action shifts slightly to the side. This changes the way the hammers strike the strings, producing a softer sound and a different tone color.
On an upright piano, the soft pedal usually moves the hammers closer to the strings. Because the hammers have a shorter distance to travel before striking the strings, the sound becomes softer.
So although the left pedal makes the sound softer on both types of piano, the mechanism is different.
Beginners usually do not need to worry very much about this pedal at first. I recommend becoming comfortable with the right damper pedal before concentrating on the left pedal.
3. Middle Pedal: The Biggest Difference
The middle pedal is where grand and upright pianos can differ the most.
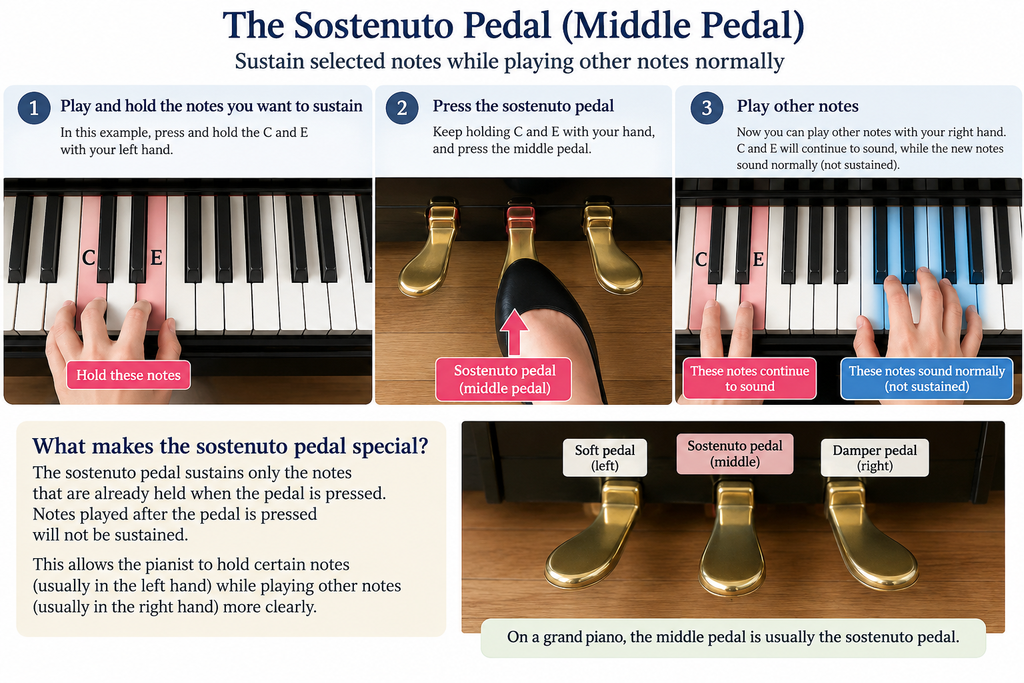
On a grand piano, the middle pedal is usually the sostenuto pedal. It allows the pianist to sustain selected notes while playing other notes normally.
On an upright piano, the middle pedal can have different functions depending on the instrument.
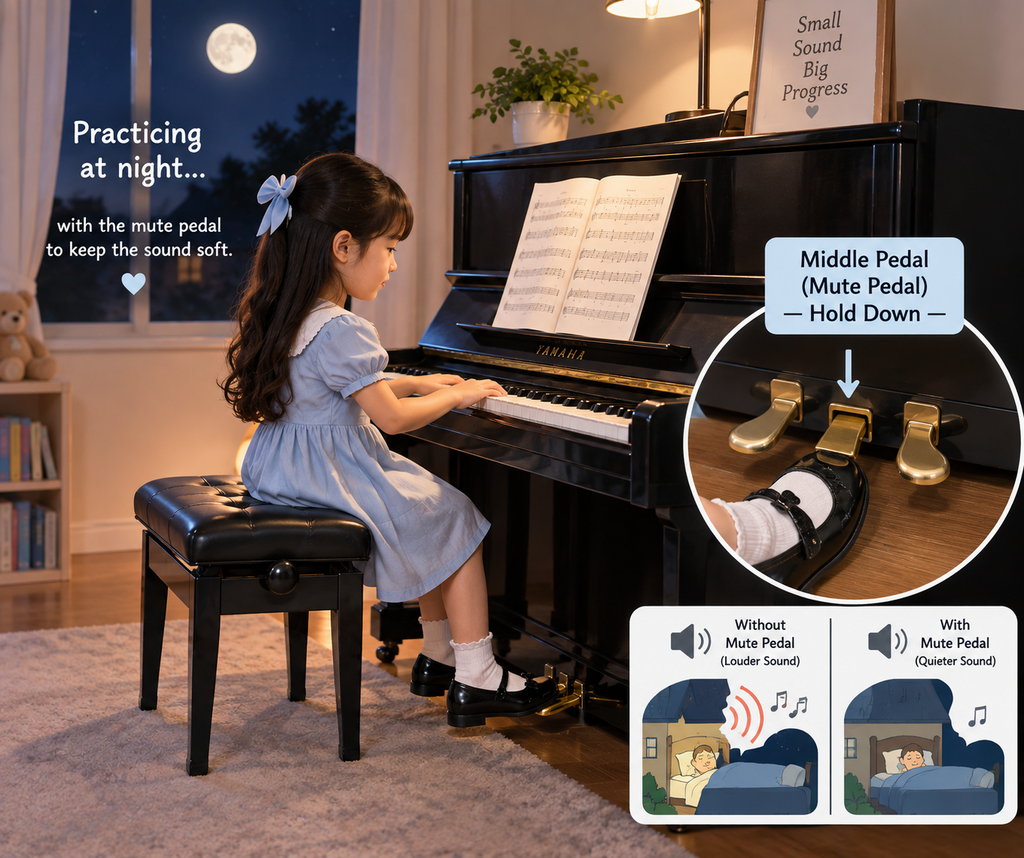
Many upright pianos have a practice or mute pedal. When engaged, it greatly reduces the volume of the piano. This can be especially useful when practicing at night or when you do not want to disturb other people in the house.
Other upright pianos may have a bass sustain pedal instead.
Because upright pianos vary, check your particular piano or its manual if you are unsure what the middle pedal does.
Piano Pedals for Beginners: How to Practice Correctly
If you are learning to use the piano pedals for the first time, I recommend taking one-on-one lessons with a piano teacher rather than learning entirely on your own. Pedaling may look simple, but correct foot position and timing are important from the beginning. Bad habits can be difficult to correct later, so learning proper technique early can make a big difference.
For piano pedals for beginners, developing good habits from the start is especially important.
Correct Foot Position for Beginners
Before using the pedal in a piece of music, beginners should first learn the correct foot position.
Place your right foot on the damper pedal, the pedal on the far right.
Most importantly:
Keep your right heel on the floor.
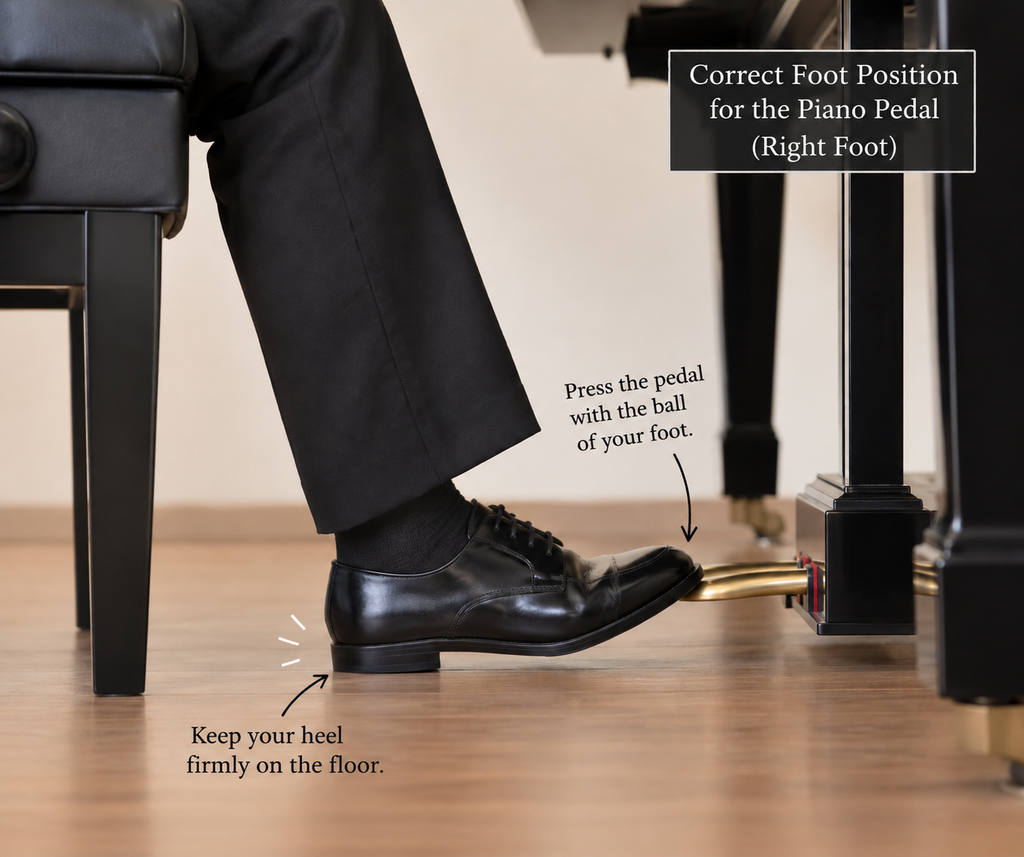
Your heel should remain in contact with the floor while the front part of your foot moves the pedal up and down.
Think about the way you use a pedal while driving a car. You do not need to lift your entire leg every time you press the pedal.
If you repeatedly lift your heel from the floor, the movement becomes unnecessarily large and your leg may become tired or uncomfortable.
Remember:
Heel stays down. The front of the foot moves.
Your left foot can stay comfortably to the side. When beginners are first learning to pedal, I recommend concentrating on the right foot and avoiding unnecessary movement of the other pedals.
Young Children May Need to Adjust the Bench
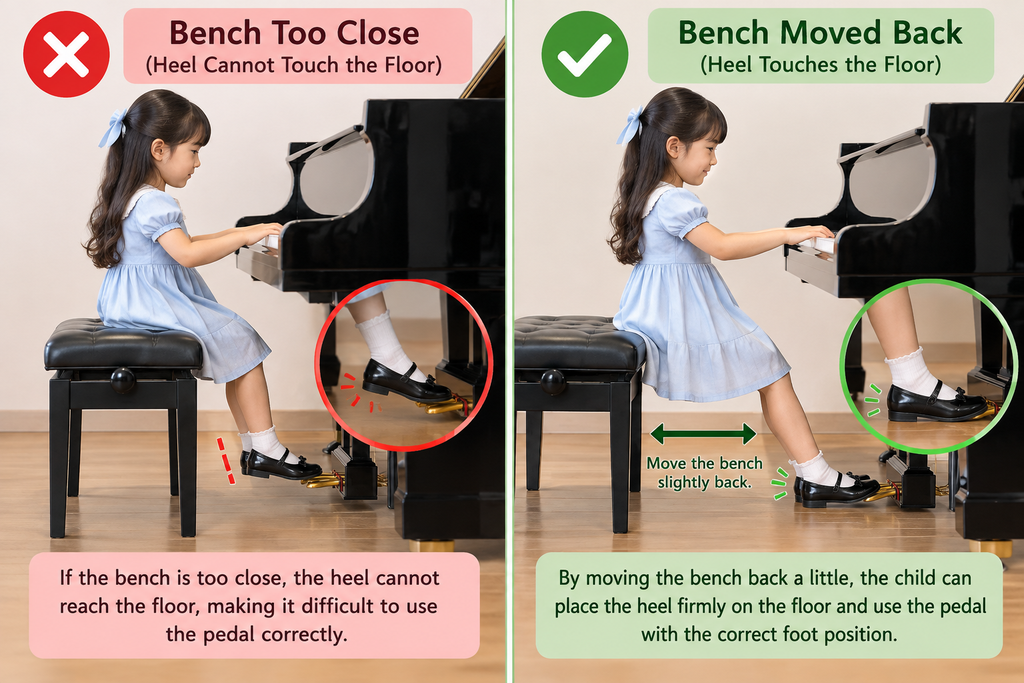
This can be more difficult for young beginners.
A five- or six-year-old child may have trouble reaching the pedal while keeping the heel on the floor. If the bench is too close to the piano, the child may reach the pedal only with the toes while the heel hangs in the air.
Try moving the bench slightly farther back so the child can place the right heel on the floor while reaching the pedal comfortably.
However, do not move the bench so far back that the child has to lean forward or stretch to reach the keyboard.
If the child’s legs are still too short to reach the pedals comfortably, a pedal extender may be a better solution.
Start With a Simple Foot Exercise
Before adding any notes, practice the pedal movement by itself.
Place your right foot on the damper pedal with your heel on the floor.
Slowly practice:
Pedal down → pedal up → pedal down → pedal up.
Watch your heel. It should remain on the floor while only the front part of your foot moves.
Keep the movement small, relaxed, and controlled.
Practice this until the movement begins to feel natural.
Add the Right Hand: C–D–E–F–G
Once the foot movement feels comfortable, you can add a very simple exercise at the piano.
Place your right hand in C position: C–D–E–F–G, using fingers 1–2–3–4–5.
Start by playing C and pressing the pedal.
Listen to how the sound continues.
Then play D.
Right after you play D, quickly release the pedal and press it down again.
Continue the same way with E, F, and G.
The basic pattern is:
Play the new note → quickly release the pedal → press it down again.
The new note comes first. The pedal change happens right after the new note is played.
This timing is important.
If you release the pedal before playing the next note, you may create an unwanted gap in the sound. If you wait too long after playing the new note, the old and new sounds can overlap and become muddy.
Practice very slowly at first.
And don’t forget your heel!
Even when changing the pedal quickly, your heel should stay on the floor. Only the front part of your foot moves.
As your hand and foot begin to coordinate naturally, you can gradually increase the speed.
When Should Beginners Add Pedal to a Piece?
One mistake beginners sometimes make is trying to learn notes, fingering, rhythm, both hands, and pedal all at the same time.
That can be overwhelming.
When practicing hands separately—right hand alone or left hand alone—I recommend practicing without the pedal.
Without pedal, you can hear every note clearly. This makes it much easier to notice wrong notes, rhythm problems, fingering mistakes, or uneven playing.
First, practice the right hand and left hand separately.
Then put both hands together.
Once you can play comfortably with both hands, begin adding the pedal.
The pedal should enhance your playing—not cover mistakes.
Use Your Ears, Not Just Your Foot
Good pedaling is not only about learning a foot movement. It is also about learning to listen.
If the music sounds muddy or too mixed together, you may need to release or change the pedal.
If the music sounds too dry when it should sound smooth and connected, you may need more pedal.
Over time, good pedaling becomes a coordination of your hands, your right foot, and your ears.
Final Tip
Beginners do not need to master all three piano pedals right away.
Start with the right damper pedal.
Learn the correct foot position, keep your heel on the floor, and practice pressing and releasing the pedal smoothly. Once that feels comfortable, practice changing the pedal with simple notes such as C–D–E–F–G.
When learning a new piece, practice each hand separately without pedal first. Put both hands together, and then gradually add the pedal while listening carefully to the sound.
Remember:
Play first. Change the pedal right after. Keep your heel down. Listen carefully.
The pedal should never be used to hide your playing. Good pedaling should make good playing sound even more beautiful.